Custom-Fitted Hearing Aid Process: Step-by-Step Guide
Struggling to follow conversations, turning the television volume up higher than everyone else, or asking people to repeat themselves again and again? These are common signs of hearing loss, and a custom-fitted hearing instrument can make a real difference to your daily life.
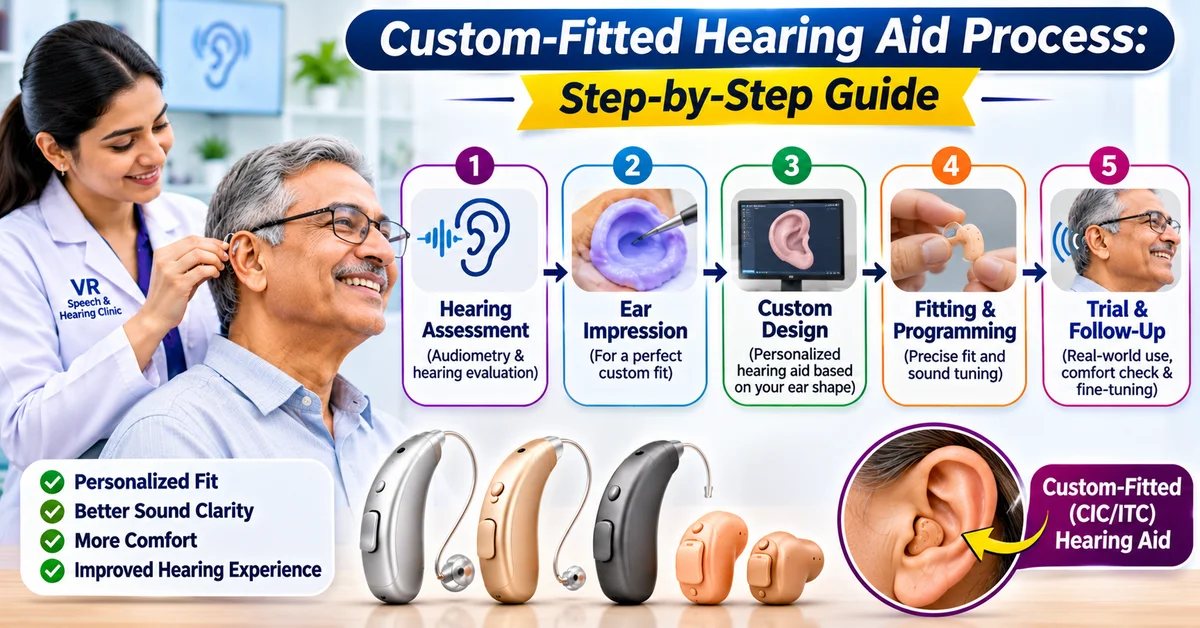
A custom-fitted hearing instrument is not something you simply pick up off a shelf. It is a device programmed and shaped to match your hearing profile, your ear anatomy, your lifestyle and your comfort needs. At VR Speech and Hearing Clinic, the process is carefully structured so that every client receives a solution that truly works for them.
This guide walks you through each stage of the journey, so you know exactly what to expect from your first appointment to long-term follow-up care.
Why Custom Fitting Matters
Every ear is different. The size and shape of your ear canal, the pattern of your hearing loss and the environments you spend your time in all influence which device will suit you best. Over-the-counter or one-size-fits-all amplifiers boost all sounds equally, which can make noise uncomfortable and speech still unclear.
A custom-fitted hearing instrument offers several advantages:
Better speech clarity in everyday situations
Improved comfort for all-day wear
Reduced feedback, whistling and sound distortion
A more secure fit that stays in place
Settings tuned to your specific hearing loss
Greater satisfaction and long-term use
Step 1: Initial Consultation and Case History
The process begins with a conversation. During your first visit, the audiologist or hearing specialist asks about your hearing concerns and general health.
Typical questions include:
When did you first notice difficulty hearing?
Is the problem in one ear or both?
Do you experience ringing, buzzing or dizziness?
Which situations are hardest, such as restaurants, meetings, phone calls or family gatherings?
Is there a family history of hearing loss?
Have you been exposed to loud noise at work or during hobbies?
Do you take any medications that may affect hearing?
This stage helps the clinician understand your communication needs and expectations. Be open and specific. The more detail you share, the better the recommendation will be.
Step 2: Otoscopic Examination
Next, the clinician looks inside your ears using an otoscope. This quick, painless check looks for:
Earwax blockage
Ear infections or inflammation
Damage to the eardrum
Structural abnormalities of the ear canal
Earwax buildup is one of the most common and easily treatable causes of reduced hearing. If a blockage is found, it may be removed first. If anything suggests a medical condition, you may be referred to an ENT doctor before hearing instruments are considered.
Step 3: Comprehensive Hearing Evaluation
A full hearing evaluation is the foundation of a custom-fitted hearing instrument. It measures how well you hear different pitches and how clearly you understand speech.
Pure-Tone Audiometry: You wear headphones and respond whenever you hear a beep. This identifies the softest sounds you can hear at different frequencies and produces a chart called an audiogram.
Speech Audiometry: This measures how well you hear and understand spoken words at comfortable and soft levels. It shows how hearing loss affects real-life communication.
Tympanometry and Middle Ear Testing: These tests check how well your eardrum and middle ear are functioning, helping distinguish between types of hearing loss.
Other Tests When Needed: Depending on your case, additional tests such as otoacoustic emissions may be recommended.
The results classify your hearing loss as mild, moderate, severe or profound, and identify whether it is conductive, sensorineural or mixed. This information directly guides the choice of device.
Step 4: Reviewing Results and Understanding Your Options
Once testing is complete, the audiologist explains your results in plain language. You will see your audiogram and learn which sounds you may be missing.
This is also the time to discuss hearing instrument options. Common styles include:
Behind-the-Ear (BTE): Sits behind the ear with a tube or earmold directing sound into the canal. Suitable for a wide range of hearing losses.
Receiver-in-Canal (RIC): A small casing behind the ear with a thin wire to a speaker in the canal. Popular for its discreet look and natural sound.
In-the-Ear (ITE): A custom-molded device filling part of the outer ear. Easier to handle and suitable for mild to severe loss.
In-the-Canal (ITC) and Completely-in-Canal (CIC): Smaller custom devices sitting in or deep within the canal. Very discreet, though they may have fewer features.
Your clinician will consider your degree of hearing loss, dexterity, vision, budget, lifestyle and cosmetic preferences before recommending the best style and technology level.
Step 5: Selecting Technology and Features
Modern hearing instruments offer many features. Your audiologist helps you choose those that match your daily needs, such as:
Noise reduction and speech enhancement
Directional microphones for conversations in crowds
Rechargeable batteries
Bluetooth connectivity for phone calls, television and music
Smartphone app control
Tinnitus support sound options
Telecoil for hearing loops
Water and dust resistance
Higher technology levels generally manage complex listening environments better, while basic levels may suit quieter lifestyles. A good clinic will never push unnecessary features, only those that benefit you.
Step 6: Taking Ear Impressions
For custom-molded devices and earmolds, an accurate ear impression is essential. This step is what makes the instrument truly custom-fitted.
Here is how it works:
The clinician places a small foam or cotton block in your ear canal to protect the eardrum.
A soft, putty-like silicone material is gently placed in your ear.
The material sets in a few minutes.
The impression is carefully removed, capturing every detail of your ear shape.
The process is safe and comfortable, with no pain involved. Some clinics now use digital 3D ear scanners instead of traditional impressions, which can improve accuracy and speed.
The impression or scan is sent to the manufacturer, where the shell or earmold is built to match your ear precisely. This usually takes about one to two weeks.
Step 7: Manufacturing and Quality Check
While your device is being made, the manufacturer creates the shell, installs the electronic components and tests the device. When it returns to the clinic, the audiologist inspects it to make sure it is built correctly, fits the impression and works as expected.
Step 8: Fitting and Programming
This is the exciting appointment where you receive your hearing instrument. The audiologist will:
Check the physical fit and comfort in your ear
Make adjustments if there is any pressure or looseness
Connect the device to specialized software
Program it based on your audiogram and personal preferences
Fine-tune volume, pitch and sound quality
Many clinics perform real-ear measurements, a verification method using a tiny microphone placed in the ear canal. It confirms that the device delivers the right amount of amplification at each frequency, rather than relying on estimates alone. This is considered a best practice in professional fitting.
Step 9: Orientation and Training
Wearing a hearing instrument is a new experience, and learning to use it properly is just as important as the fitting. Your audiologist will teach you how to:
Insert and remove the device correctly
Turn it on and off
Adjust volume and change programs
Charge or replace batteries
Clean and maintain it daily
Pair it with your phone or television
Handle common problems like whistling or blocked sound
You may also receive a user guide, cleaning tools, a storage case and tips for protecting the device from moisture.
Step 10: Adjustment Period and What to Expect
Your brain needs time to adapt to sounds it may not have heard clearly for years. In the first few weeks, you may notice:
Everyday sounds like footsteps, rustling paper or the refrigerator seem louder
Your own voice sounds different
Mild fatigue from the extra listening effort
Slight ear pressure or a feeling of fullness
These are normal. To adapt well:
Wear your device consistently, starting with a few hours daily and building up
Begin in quiet places and gradually move to noisier ones
Practice conversations with family and friends
Keep a note of situations that feel difficult so they can be addressed at follow-up
Most people adjust within four to eight weeks.
Step 11: Follow-Up Appointments and Fine-Tuning
Follow-up care is a key part of success. A typical schedule includes a review within one to two weeks, then another after a month. At these visits, the audiologist:
Reviews your experience
Makes fine adjustments to sound quality
Checks the fit and comfort
Answers questions
Repeats hearing checks if needed
Never hesitate to return if something feels wrong. Small tweaks can make a major difference.
Step 12: Long-Term Care and Maintenance
To keep your hearing instrument performing well:
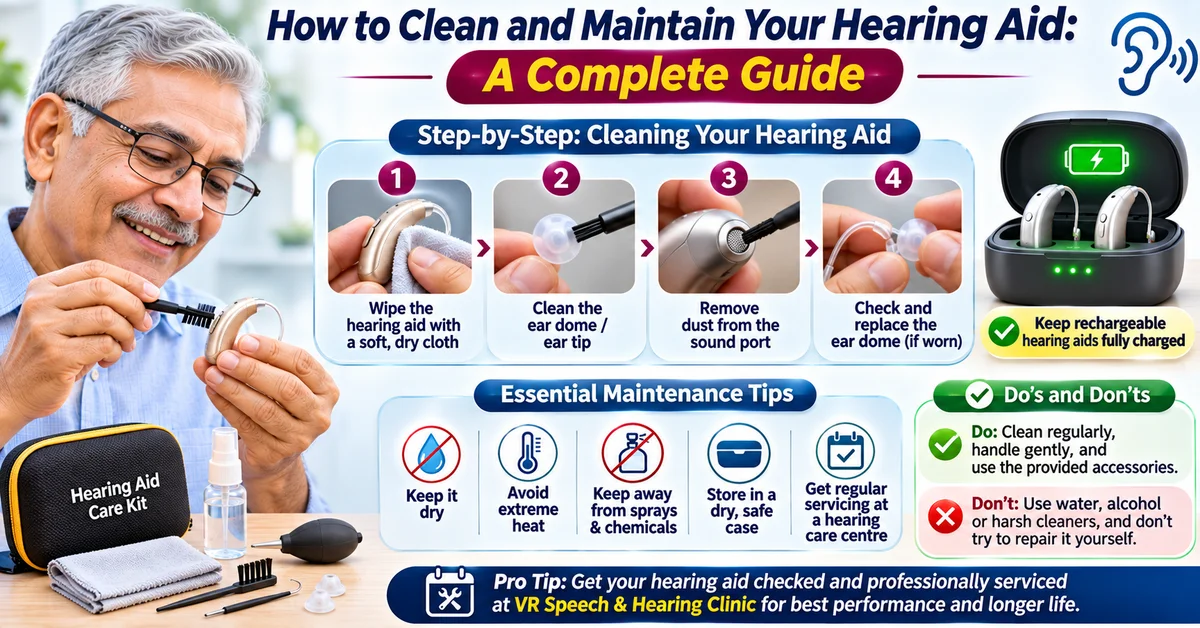
Clean it daily with a soft cloth or brush
Keep it dry and away from heat and moisture
Replace wax guards and filters as advised
Store it in its case when not in use
Book routine check-ups every six to twelve months
Have your hearing re-tested yearly, since hearing can change over time
Most hearing instruments last between three and seven years with proper care.
How Long Does the Entire Process Take?
From the first consultation to the final fitting, the process usually takes between one and three weeks. Custom-made devices require manufacturing time, while ready-made styles can sometimes be fitted on the same day. Ongoing fine-tuning continues for several weeks afterwards.
Why Choose VR Speech and Hearing Clinic?
Choosing the right clinic is as important as choosing the right device. At VR Speech and Hearing Clinic, you can expect:
A thorough, unhurried hearing evaluation
Clear, honest explanations of your results
Personalized recommendations rather than one-size-fits-all solutions
Precise ear impressions and careful fitting
Verification of the device for accurate sound delivery
Friendly guidance during the adjustment period
Dependable follow-up and maintenance support
Our goal is not simply to sell a device but to improve your communication, confidence and quality of life.
Frequently Asked Questions (FAQs)
1. What is a custom-fitted hearing instrument?
It is a hearing device made or programmed specifically for your ear shape and hearing loss, rather than a generic product. It offers better comfort, sound quality and performance.
2. Do I need a hearing test before getting a hearing aid?
Yes. A comprehensive hearing evaluation is essential to understand the type and degree of your hearing loss and to program the device correctly.
3. Is the ear impression process painful?
No. The process is quick, safe and painless. You may feel slight fullness or coolness in the ear for a few minutes.
4. How long does it take to get a custom hearing aid?
Typically one to three weeks, depending on manufacturing time and appointment scheduling.
5. Will hearing aids restore my hearing to normal?
Hearing aids do not cure hearing loss, but they significantly improve your ability to hear and understand speech and environmental sounds.
6. How long does it take to get used to hearing aids?
Most people adjust in four to eight weeks, though it can take longer for some. Consistent daily use helps.
7. How often should I have follow-up visits?
Expect visits within the first few weeks, then routine check-ups every six to twelve months.
8. Can I wear hearing aids in both ears?
If you have hearing loss in both ears, two devices are usually recommended for better sound balance, directional hearing and speech understanding.
9. How long do hearing instruments last?
With proper care, most last three to seven years.
10. What if my hearing instrument feels uncomfortable?
Visit your audiologist. Shell modifications, earmold adjustments or reprogramming can usually fix discomfort quickly.
Conclusion
Getting a custom-fitted hearing instrument is a step-by-step journey that includes a detailed consultation, hearing evaluation, device selection, ear impressions, expert fitting, training and ongoing support. Each stage plays an important role in ensuring your device delivers clear, comfortable and natural sound.
If you suspect hearing loss or are struggling with your current device, do not wait. Early action protects your communication, relationships and wellbeing. Book an appointment with VR Speech and Hearing Clinic and take the first step toward better hearing today.